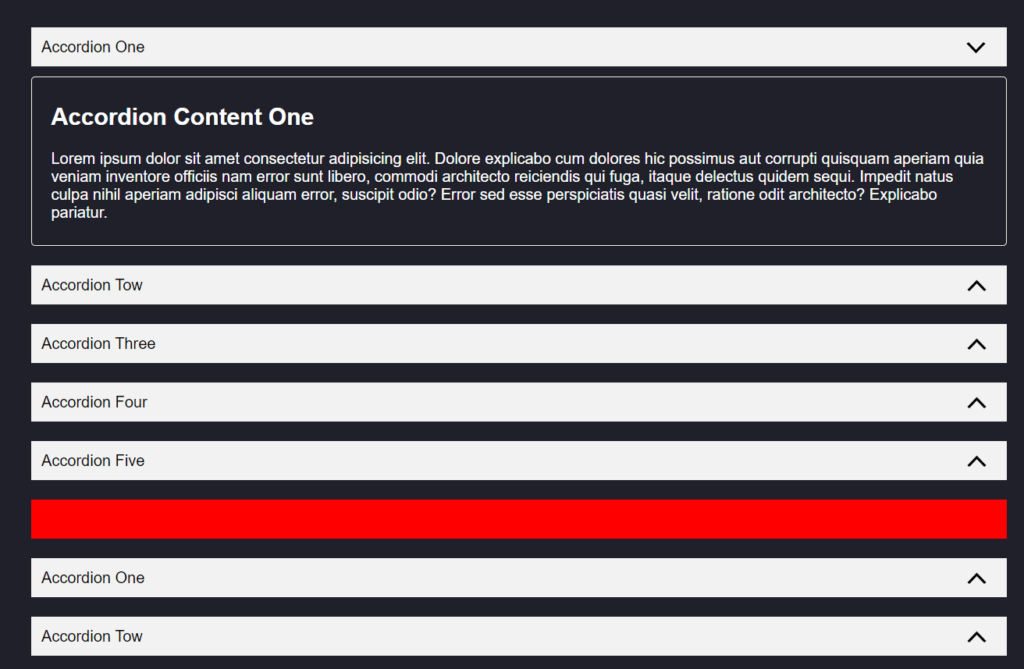
In today’s digital landscape, creating interactive and user-friendly web interfaces is paramount. One powerful way to enhance user experience and organize content is by implementing dynamic accordions on web pages. Accordion elements allow users to expand or collapse sections of content, revealing information as needed. By incorporating JavaScript, a versatile programming language, we can take accordions to the next level, enabling dynamic behavior that engages and captivates users.
In this article How to create Dynamic According using JavaScript , we will delve into the art of creating dynamic accordions using JavaScript. Whether you’re a seasoned web developer or just starting out, this comprehensive guide will equip you with the knowledge and skills needed to implement and customize dynamic accordions to suit your specific requirements.
Throughout this tutorial, we will explore various techniques, methodologies, and best practices for creating accordions that adapt to user interactions. We’ll cover essential JavaScript concepts, such as DOM manipulation and event handling, to empower you to build dynamic and interactive accordion components from scratch.
By the end of this article, you’ll have a solid understanding of the inner workings of dynamic accordions, enabling you to create engaging user interfaces that elevate the browsing experience. So, let’s embark on this enlightening journey and unlock the secrets of creating dynamic accordions using JavaScript.

Dynamic according using JavaScript
Step 1: Setting up the HTML structure
<!DOCTYPE html>
<html>

<head>
  <title>Tabs</title>
  <meta charset="UTF-8" />
  <meta http-equiv="X-UA-Compatible" content="IE=edge" />
  <meta name="viewport" content="width=device-width, initial-scale=1.0" />
  <link rel="stylesheet" href="assets/css/style.css" />
  <link rel="stylesheet" href="https://cdnjs.cloudflare.com/ajax/libs/font-awesome/5.15.4/css/all.min.css" />
</head>

<body>


   <div class="container">

    <div class="accordion">
      <div class="accordion-item">
        <div class="accordion-header ">
          accordion one
        </div>
        <div class="accordion-content ">
          <h2> accordion content one</h2>
          <p>Dynamic according using JavaScript Dynamic according using JavaScript </p>
        </div>
      </div>
      <div class="accordion-item">
        <div class="accordion-header">
          accordion tow
        </div>
        <div class="accordion-content">
          <h2> accordion content tow</h2>
           <p>Dynamic according using JavaScript Dynamic according using JavaScript </p>
        </div>
      </div>
      <div class="accordion-item">
        <div class="accordion-header">
          accordion three
        </div>
        <div class="accordion-content">
          <h2> accordion content three</h2>
            <p>Dynamic according using JavaScript Dynamic according using JavaScript </p>
        </div>
      </div>
      <div class="accordion-item">
        <div class="accordion-header">
          accordion four
        </div>
        <div class="accordion-content">
          <h2> accordion content four</h2>
           <p> Dynamic according using JavaScript Dynamic using JavaScript  according </p>
        </div>
      </div>
      <div class="accordion-item">
        <div class="accordion-header">
          accordion five
        </div>
        <div class="accordion-content">
          <h2> accordion content five</h2>
           <p> Dynamic using JavaScript  according Dynamic using JavaScript  according </p>
        </div>
      </div>
    </div>


  <script src="assets/js/index.js"></script>
</body>

</html>
Step 2:Writing the JavaScript code
initialize(".accordion");

function initialize(containerSelector) {
  var accordionContainer = document.querySelectorAll(containerSelector);
  accordionContainer.forEach((container, index) => {
    const accordionHeader = container.querySelectorAll(".accordion-item .accordion-header");
    const accordionContent = container.querySelectorAll(".accordion-item .accordion-content");
    accordionHeader.forEach((accordionTaitle, index) => {
      accordionTaitle.addEventListener("click", () => {
        accordionTaitle.classList.toggle("active");
        accordionContent[index].classList.toggle("active");
        accordionContent.forEach((content, i) => {
          if (i !== index && content.classList.toggle("active")) {
            content.classList.toggle("active");
          }
        });
         accordionHeader.forEach((content, i) => {
          if (i !== index && content.classList.toggle("active")) {
            content.classList.toggle("active");
          }
        });
      });
    });
  });
}
Step 3: Styling the accordion
Code link here click here
body {
  background-color: #1f2029;
  font-family: Arial, Helvetica, sans-serif;
  font-weight: normal;
}

.container {
  max-width: 1000px;
  margin: 60px auto;
}


ul {
  list-style: none;
  margin: 0;
  padding: 0;
}

li {
  color: #fff;
}

p {
  color: #fff;
}

.tabs {
  display: flex;
  align-items: center;
  column-gap: 10px;
}

.tabs li.active {
  background-color: red;
  color: #fff;
}

.tabs li {
  cursor: pointer;
  padding: 10px;
  border: solid 1px #f2f2f2;
  border-radius: 6px;
}

.tab-panel {
  display: none;
}

.tab-panel.active {
  display: block !important;
}

.tabContent {
  margin-top: 10px;
  border: solid 1px #f2f2f2;
  padding: 10px 20px;
  border-radius: 6px;
  color: #fff;
}

.tabs-container {
  margin-bottom: 40px;
}


/* accordion-item */
.accordion-item {
  margin-bottom: 20px;
}

.accordion-header {
  border: solid 1px #f2f2f2;
  padding: 10px 10px;
  color: #000;
  cursor: pointer;
  background-color: #f2f2f2;
  text-transform: capitalize;
  position: relative;
}

.accordion-header::after {
  content: '';
  position: absolute;
  width: 40px;
  height: 20px;
   background-image: url(../img/arrow.png);
  background-position: right 10px center;
  background-size: 20px;
  background-repeat: no-repeat;
  right: 10px;
   transform: rotate(0);
}

.active.accordion-header::after {
  transform: rotate(180deg);
}

.accordion-content {
  display: none;
  margin-top: 10px;
}

.accordion-content {
  border: solid 1px #f2f2f2;
  padding: 8px 20px;
  border-radius: 4px;
  min-height: 100px;
}

.accordion-content h2 {
  color: #fff;
  text-transform: capitalize;
}

.accordion-content.active {
  display: block !important;
}

.separator {
  background-color: #ff0000;
  margin-bottom: 20px;
  margin-top: 20px;
  padding: 20px;
  color: #000;
}
Step 4: Testing and refinement
With the HTML, CSS, and JavaScript in place, you can now test your dynamic accordion. Open the HTML file in a web browser, and you should see that clicking on a section’s title expands or collapses its content area. You can add more sections by duplicating the HTML structure within the <ul> element.
If you encounter any issues or want to enhance the accordion further, feel free to experiment and make modifications to the code. You can add animations, transitions, or additional functionality based on your project requirements.
Conclusion:
In this article, we’ve learned how to create dynamic accordions using JavaScript. By combining HTML, CSS, and JavaScript, we’ve built an accordion that allows users to expand and collapse sections as needed. This dynamic behavior enhances the user experience and provides a more interactive way to present content on your website. With the knowledge gained from this tutorial, you can now create and customize dynamic accordions to suit your specific needs. Happy coding!
More Article Click


