Enable GZIP Compression
In today’s fast-paced digital world, speed matters more than ever. We’ve all experienced the frustration of waiting for a slow website to load. It’s not just annoying; it can also hurt the website’s performance on search engines. That’s where GZIP compression comes in handy Enable GZIP Compression.
GZIP compression is like magic for the internet. It shrinks down files so that they take up less space and load faster. This means you spend less time waiting and more time enjoying the content you want to see. It’s a simple yet powerful tool that makes a big difference
By using GZIP compression, websites can provide a smoother and more enjoyable experience for users. Faster loading times mean happier visitors and better search engine rankings. It’s a win-win situation that showcases the importance of technological innovations in improving our online experiences.
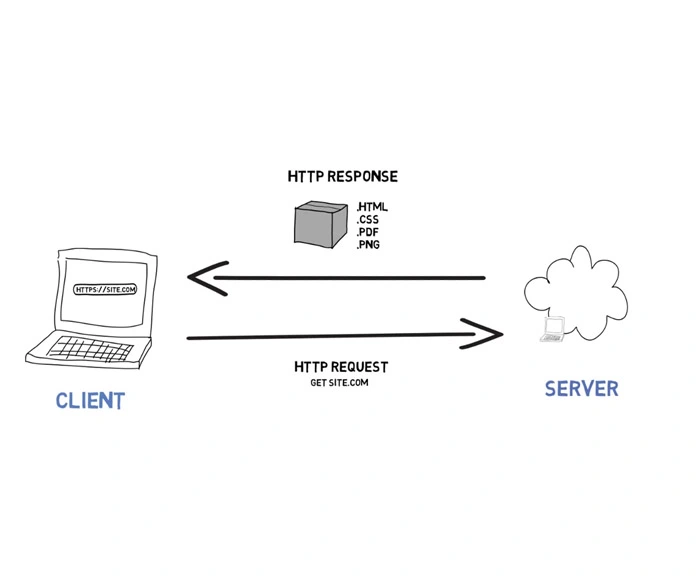
GZIP compression is a method used to reduce the size of web files, such as HTML, CSS, and JavaScript, before they are sent over the internet. By compressing these files, we can significantly reduce the amount of data that needs to be transferred, resulting in faster load times for our website visitors.
What is GZIP compression? (Enable GZIP Compression)
GZip compress files like HTML, JavaScript and CSS while serving request to the browser. As size of the file is reduced, it is served to the user in a faster manner. Not all browser support compression but now all modern browser support it. It is highly recommended to use Gzip, but it has a downside, which is increasing the CPU usage of the server which may be a concern sometimes. Using Gzip with client side caching will help in increased performance.
GZIP was introduced in 1992 and originally intended for use by GNU (hence the “G” in Enable GZIP Compression) as a free and open-source alternative to proprietary compression methods at the time. This accessibility contributed to GZIP’s ubiquity.
Enable GZIP Compression across HTTP normally happens completely transparently. The end-user should be completely unaware that it is happening; the browser would do it behind the scenes for them. And from the webserver end, it is simply a matter of turning on a config setting in your web server software. From your perspective, that’s really all you need to know; just set the gzip setting on your server (or ask your ISP to do it). It’s quite possible it may already be active on your site without you even knowing.

Why Do We Use GZIP Compression?
While GZIP is recognized as an effective compression method, it’s important to note that it’s not the only option available, nor is it necessarily the most efficient for reducing file sizes. Although GZIP can typically reduce data by up to 70%, comparative tests across different compression algorithms have shown that alternatives like Brotli often outperform GZIP, particularly for text-based assets. Despite this, GZIP continues to be widely used for several reasons.
One significant advantage of GZIP is its speed. It compresses files much faster than comparable methods, which is crucial for optimizing data transfers over the web. After all, the primary aim of compression is to enhance website speed, so it’s counterproductive if the compression process itself slows things down.
Another key factor is the resource efficiency of GZIP. It requires relatively low computing power and temporary memory space to function, making it suitable for servers with limited resources. Considering that half of global web traffic comes from mobile devices, GZIP’s efficiency in delivering web pages to both high-powered and low-powered devices is invaluable.
In summary, while GZIP may not always offer the smallest file sizes, its speed and resource efficiency make it a preferred choice for many web applications
How To Enable GZIP Compression on an Apache Web Server
So, how can you enable GZIP compression for your website? Let’s dive into the steps:
- Check if GZIP Compression is Enabled: Before making any changes, it’s essential to determine whether GZIP compression is already enabled on your web server. You can use online tools like GTmetrix or Pingdom to analyze your website’s performance and see if GZIP compression is being utilized.
- Access Your Server Configuration: If GZIP compression isn’t enabled, don’t worry; it’s relatively simple to set up. You’ll need access to your server configuration files, typically either .htaccess for Apache servers or nginx.conf for Nginx servers.
Enable GZIP Compression for Apache Servers:
- If you’re using an Apache server, you can enable GZIP compression by adding the following lines to your .htaccess file:
<IfModule mod_deflate.c>
  # Compress HTML, CSS, JavaScript, Text, XML and fonts
  AddOutputFilterByType DEFLATE application/javascript
  AddOutputFilterByType DEFLATE application/rss+xml
  AddOutputFilterByType DEFLATE application/vnd.ms-fontobject
  AddOutputFilterByType DEFLATE application/x-font
  AddOutputFilterByType DEFLATE application/x-font-opentype
  AddOutputFilterByType DEFLATE application/x-font-otf
  AddOutputFilterByType DEFLATE application/x-font-truetype
  AddOutputFilterByType DEFLATE application/x-font-ttf
  AddOutputFilterByType DEFLATE application/x-javascript
  AddOutputFilterByType DEFLATE application/xhtml+xml
  AddOutputFilterByType DEFLATE application/xml
  AddOutputFilterByType DEFLATE font/opentype
  AddOutputFilterByType DEFLATE font/otf
  AddOutputFilterByType DEFLATE font/ttf
  AddOutputFilterByType DEFLATE image/svg+xml
  AddOutputFilterByType DEFLATE image/x-icon
  AddOutputFilterByType DEFLATE text/css
  AddOutputFilterByType DEFLATE text/html
  AddOutputFilterByType DEFLATE text/javascript
  AddOutputFilterByType DEFLATE text/plain
  AddOutputFilterByType DEFLATE text/xml

  # Remove browser bugs (only needed for really old browsers)
  BrowserMatch ^Mozilla/4 gzip-only-text/html
  BrowserMatch ^Mozilla/4\.0[678] no-gzip
  BrowserMatch \bMSIE !no-gzip !gzip-only-text/html
  Header append Vary User-Agent
</IfModule>
Enable GZIP Compression for Nginx Servers:
For Nginx servers, you’ll need to add the following lines to your nginx.conf file:
gzip on;
gzip_disable "msie6";
gzip_vary on;
gzip_proxied any;
gzip_comp_level 6;
gzip_buffers 16 8k;
gzip_http_version 1.1;
gzip_types text/plain text/css application/json application/x-javascript text/xml application/xml application/xml+rss text/javascript;
- Test and Verify: Once you’ve made the necessary changes to your server configuration, it’s crucial to test and verify that GZIP compression is working correctly. You can use online tools or browser developer tools to inspect the response headers and ensure that content-encoding: gzip is present.
- Monitor Performance: With GZIP compression enabled, keep an eye on your website’s performance metrics using tools like Google PageSpeed Insights or WebPageTest. You should notice a significant improvement in load times, resulting in a better user experience for your visitors.
By enabling GZIP compression on your web server, you can dramatically improve your website’s speed and performance. With faster load times, you’ll not only enhance user satisfaction but also boost your search engine rankings and overall online presence. So, don’t wait any longer – unleash the power of GZIP compression and take your website to new heights of speed and efficiency! for more details here : link


