JavaScript Local Storage vs Session Storage vs Cookie
In the world of web development, managing client-side data efficiently is crucial for building robust and user-friendly applications. Local Storage, Session Storage, and Cookies are three commonly used mechanisms for storing data on the client side. Each has its unique features, use cases, and limitations. In this article, we’ll dive into the differences between Local Storage, Session Storage, and Cookies, and discuss when to use each one.

Introduction to Client-Side Storage
Before we delve into the specifics of Local Storage, Session Storage, and Cookies, let’s understand the basic concepts of client-side storage.
Cookies:
Cookies are small pieces of data stored in the browser. They are sent with every HTTP request to the server, making them suitable for persistent data that needs to be sent back and forth between the client and server.
Cookies have been a staple of web development for a long time. They are small pieces of data stored in the browser and sent with every HTTP request to the server. Cookies are commonly used for various purposes, such as maintaining user sessions, tracking user behavior, and storing user preferences.
Local Storage:
Local Storage provides a way to store key-value pairs in the browser with no expiration date. The data persists even after the browser is closed, making it ideal for storing long-term preferences or user settings.
Local Storage provides a way to store key-value pairs in the browser with no expiration date. This means that the data stored in Local Storage persists even after the browser is closed and can be accessed by any page from the same origin. It’s an excellent choice for storing long-term preferences or user settings that should remain consistent across multiple sessions.
Session Storage:
Session Storage is similar to Local Storage, but the data is cleared when the session ends (i.e., when the browser is closed). It’s useful for storing temporary data that should be available only during the current browsing session.
Similar to Local Storage, Session Storage allows you to store data in the browser, but with one crucial difference: the data stored in Session Storage is cleared when the browser session ends. This means that the data is only available for the duration of the page session, making it suitable for storing temporary information that should not persist across sessions.
Local Storage vs Session Storage vs Cookie
JavaScript Local Storage vs Session Storage vs Cookie Differences and Use Cases
Now, let’s explore the differences between Local Storage, Session Storage, and Cookies, along with examples of when to use each one.
Local Storage:
// Setting data in Local Storage
localStorage.setItem('username', 'JohnDoe');

// Retrieving data from Local Storage
const username = localStorage.getItem('username');
console.log(username); // Output: JohnDoe
- Use Case: Storing user preferences, such as theme selection or language settings, that should persist across browser sessions.
- Advantages:
- Data persists even after the browser is closed.
- Supports larger storage capacity compared to Cookies.
- Limitations:
- Data is stored as strings only.
- Not suitable for sensitive data due to lack of encryption.
JavaScript Project Todo-List with JavaScript Local Storage
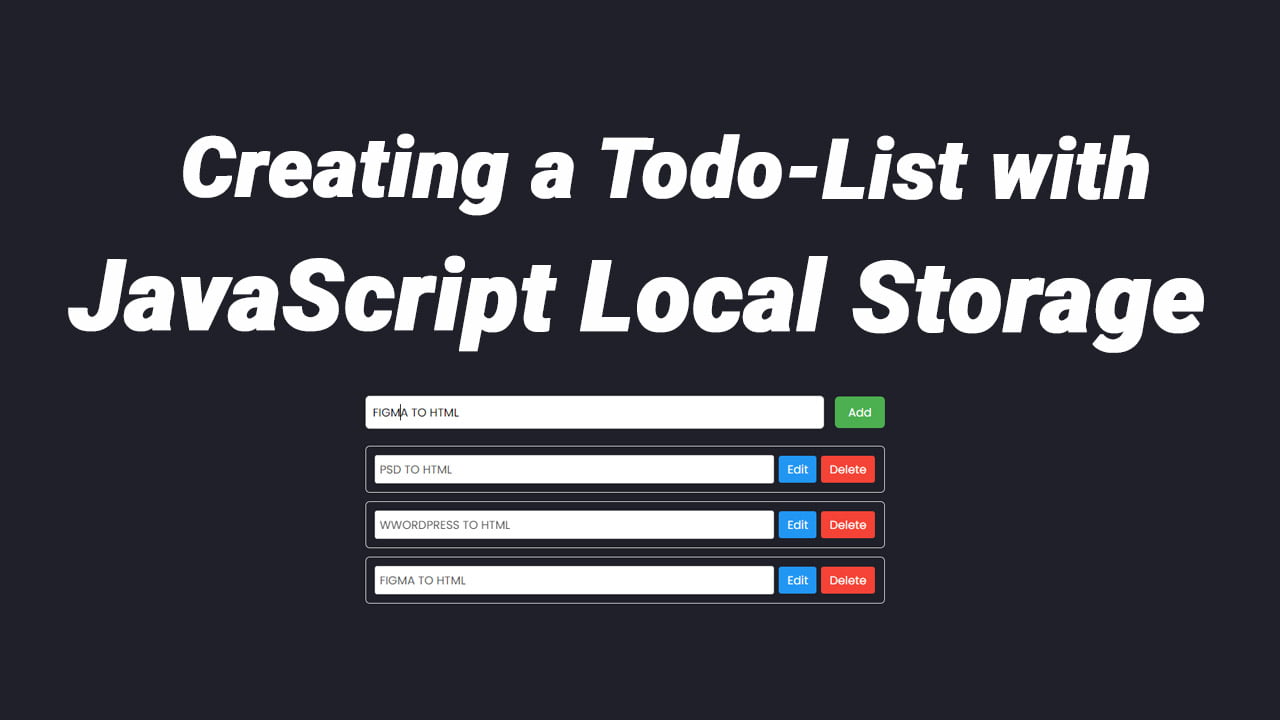
In the realm of web development, creating a todo list application is a quintessential project for beginners. It encapsulates the core concepts of HTML for structure, CSS for styling, and JavaScript for interactivity. In this article, we’ll walk through the development of a basic todo list application utilizing these technologies.
Project Overview
Our todo list application will have the following features:
- Ability to add new tasks.
- Ability to edit existing tasks.
- Ability to delete tasks.
- Data persistence using local storage.
Project Structure
Let’s dissect the structure of our project:
HTML
<div class="todo-list-container">
    <form class="todo-list-header">
        <input id="text-input" type="text" value="">
        <button type="submit" id="text-add">Add</button>
    </form>
    <div id="inputerro"></div>
    <div class="todo-content">
        <ul>

        </ul>
    </div>
</div>
This is the HTML structure of our application. It consists of a form to input new tasks, a container to display existing tasks, and buttons for editing and deleting tasks.
Styling with CSS
.todo-list-container {
  width: 600px;
  margin: 0 auto;
  font-family: Arial, sans-serif;
}

.todo-list-header {
  margin-bottom: 20px;
  display: flex;
  justify-content: space-between;
  align-items: center;
}

.todo-list-header input[type="text"] {
  width: calc(100% - 70px);
  padding: 8px;
  border: 1px solid #ccc;
  border-radius: 5px;
  outline: none;
}

.todo-list-header button {
  padding: 8px 15px;
  border: none;
  border-radius: 5px;
  background-color: #4CAF50;
  color: white;
  cursor: pointer;
}

.todo-list-header button:hover {
  background-color: #45a049;
}

.todo-content ul {
  list-style-type: none;
  padding: 0;
}

.todo-content li {
  margin-bottom: 10px;
  padding: 10px;
  border: 1px solid #ccc;
  border-radius: 5px;
  display: flex;

}

.todo-content li input[type="text"] {
  width: calc(100% - 70px);
  padding: 5px;
  border: 1px solid #ccc;
  border-radius: 3px;
  outline: none;
}

.todo-content li button {
  margin-left: 5px;
  padding: 5px 10px;
  border: none;
  border-radius: 3px;
  background-color: #f44336;
  color: white;
  cursor: pointer;
}

.todo-content li button.edit {
  background-color: #2196F3;
}

.todo-content li button:hover {
  background-color: #d32f2f;
}

.todo-content li button.edit:hover {
  background-color: #1976D2;
}
.todo-content li .button-container {
  display: flex;
  align-items: center;
}

.todo-content li .button-container button {
  margin-left: 5px;
}

.todo-content li button {
  padding: 5px 10px;
  border: none;
  border-radius: 3px;
  background-color: #f44336;
  color: white;
  cursor: pointer;
}

.todo-content li button.edit {
  background-color: #2196F3;
}

.todo-content li button:hover {
  background-color: #d32f2f;
}

.todo-content li button.edit:hover {
  background-color: #1976D2;
}
We’ve applied some basic styling to our elements to enhance their appearance. The CSS rules define the layout, colors, and styles of various components such as input fields, buttons, and task items.
Interactivity with JavaScript
const addButton = document.getElementById("text-add");
const todoList = document.querySelector(".todo-content ul");

function addTodo() {
    var textinput = document.getElementById("text-input").value;
    if (textinput != "") {
        const newitem = document.createElement("li");
        newitem.innerHTML = `<input type="text" disabled  value="${textinput}">
           <div class="button-container">
        <button class="edit">Edit</button>
        <button class="delete">Delete</button>
      </div>`
        todoList.appendChild(newitem);
        document.getElementById("text-add").value = "";
        let todos = JSON.parse(localStorage.getItem("textinput")) ?? [];
        console.log(todos);
        todos.push(textinput);
        localStorage.setItem("textinput", JSON.stringify(todos))
    }
}

let displayData = () => {
    let todos = JSON.parse(localStorage.getItem("textinput")) ?? [];
    let finalData = "";
    todos.forEach((element, i) => {
        finalData += `<li><input type="text" disabled  value="${element}">
           <div class="button-container">
        <button onclick="updateTodoInStorage(${i})" class="edit">Edit</button>
        <button onclick="removeData(${i})" class="delete">Delete</button>
      </div></li>`;
    });
    todoList.innerHTML = finalData;
}

let removeData = (index) => {
    let todos = JSON.parse(localStorage.getItem("textinput")) ?? [];
    alert(index);
    todos.splice(index, 1);
    localStorage.setItem("textinput", JSON.stringify(todos))
}


function deleteTodo(event) {
    const listItem = event.target.closest("li");
    todoList.removeChild(listItem);
    // removeTodo(listItem.querySelector("input[type='text']").value);
}

function editTodo(event) {
    const listItem = event.target.closest("li");
    const textInput = listItem.querySelector("input[type='text']");
    textInput.disabled = !textInput.disabled;
    if (textInput.disabled) {
        event.target.textContent = "Edit";
    } else {
        event.target.textContent = "Save";
    }
}

function updateTodoInStorage(index) {
    console.log("Index:", index);
    let todos = JSON.parse(localStorage.getItem("textinput")) ?? [];

    const listItems = Array.from(todoList.children);
    console.log(listItems);
    const updatedTodo = listItems[index].querySelector("input[type='text']").value;

    todos[index] = updatedTodo;
    console.log("Updated Todos:", todos);

    localStorage.setItem("textinput", JSON.stringify(todos));

}


todoList.addEventListener("click", function (event) {
    if (event.target.classList.contains("edit")) {
        editTodo(event);
    } else if (event.target.classList.contains("delete")) {
        deleteTodo(event);
    }
});

addButton.addEventListener("click", function (e) {
    e.preventDefault();
    addTodo();
});

displayData();
The JavaScript code provides the functionality to our todo list application. Let’s break down the key functionalities:
- Adding a Task: When the user enters a task and clicks the “Add” button, the task gets added to the list.
- Editing a Task: Clicking the “Edit” button enables editing of the task. Upon saving, the task is updated.
- Deleting a Task: Clicking the “Delete” button removes the task from the list.
- Data Persistence: The application stores tasks locally using the browser’s local storage, ensuring that tasks persist even after the page is refreshed.
Session Storage:
// Setting data in Session Storage
sessionStorage.setItem('token', 'abc123');

// Retrieving data from Session Storage
const token = sessionStorage.getItem('token');
console.log(token); // Output: abc123
- Use Case: Storing temporary data, such as items in a shopping cart, that should be cleared when the browser session ends.
- Advantages:
- Data is cleared when the browser is closed, enhancing security.
- Similar API to Local Storage for ease of use.
- Limitations:
- Data is limited to the current browser session.
- Limited storage capacity compared to Local Storage.
Cookies:
// Setting a cookie
document.cookie = 'username=JohnDoe; expires=Fri, 31 Dec 9999 23:59:59 GMT';

// Retrieving cookies
const cookies = document.cookie.split(';');
console.log(cookies); // Output: ["username=JohnDoe"]
- Use Case: Storing user authentication tokens or session identifiers.
- Advantages:
- Can be used for both server-side and client-side data storage.
- Supports setting expiration dates for persistent data.
- Limitations:
- Limited storage capacity (usually 4KB per cookie).
- Sent with every HTTP request, increasing bandwidth usage.
Conclusion
In conclusion, Local Storage vs Session Storage vs Cookie are all valuable tools for managing client-side data in web applications. Choosing the right storage mechanism depends on factors such as data persistence requirements, security considerations, and storage capacity.
- Use Local Storage for long-term storage of user preferences or settings.
- Use Session Storage for temporary data that should be cleared when the browser session ends.
- Use Cookies for storing small pieces of data that need to be sent with every HTTP request, such as authentication tokens.


