ChatGPT has gained significant popularity in recent months or years, completely changing how we interact with automated chatbots. As a beginner web developer, you might be curious about creating your own ChatGPT. The good news is that it is possible to create a ChatGPT clone using HTML, CSS, and vanilla JavaScript.
If you’re unfamiliar, ChatGPT is an advanced chatbot model developed by OpenAI. It uses artificial intelligence to generate human-like responses in a conversational format. ChatGPT has gained widespread popularity due to its ability to simulate natural conversations.
In this blog post, we will guide you through the steps of creating your very own ChatGPT using HTML, CSS, and JavaScript. By building a ChatGPT clone project, beginner web developers can gain practical experience by applying their HTML, CSS, and JavaScript skills to real-world projects.
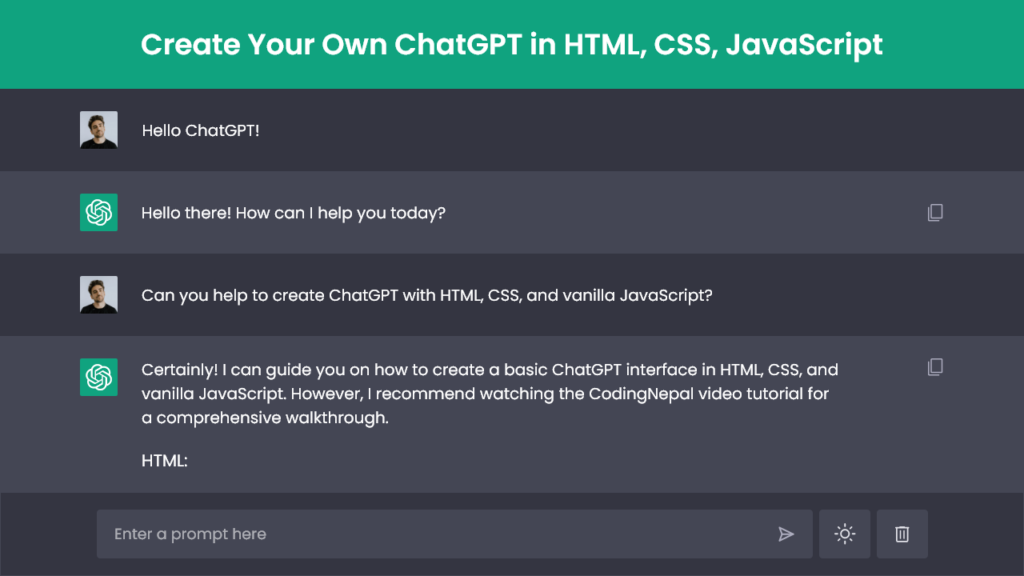
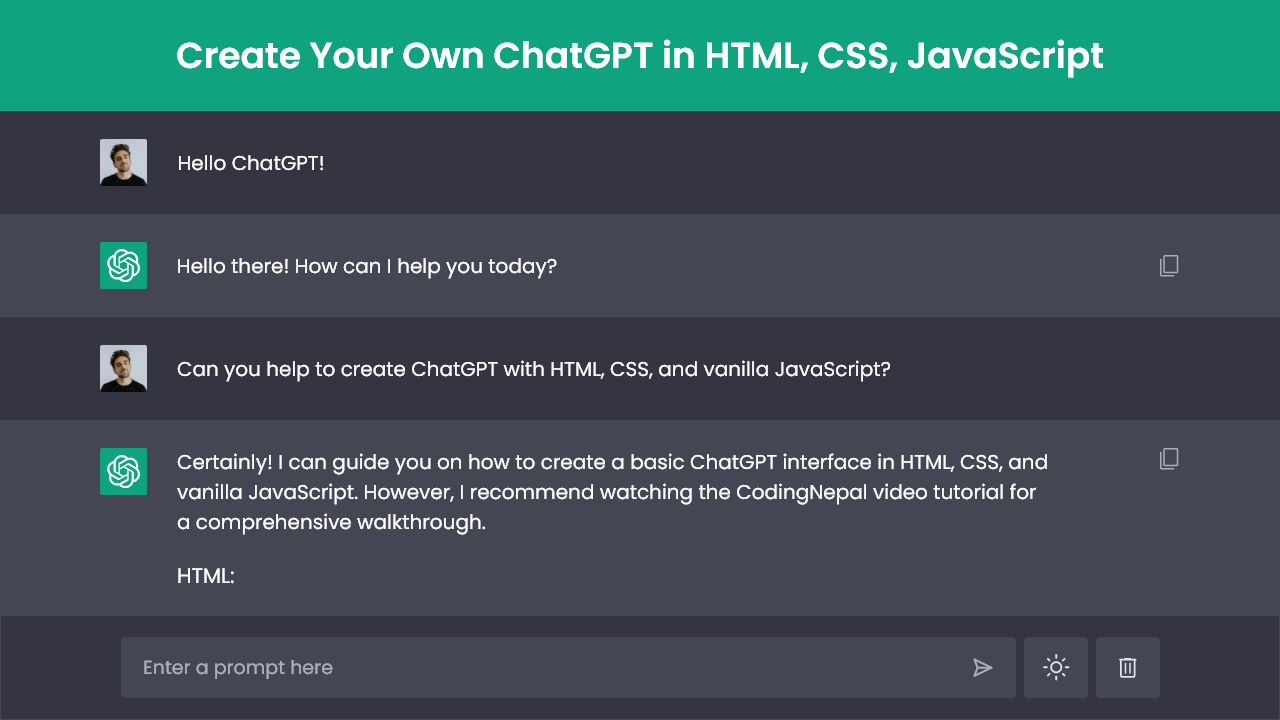
This ChatGPT clone project allows you to ask questions and receive instant responses. Additionally, you have the option to switch between dark and light themes. Your chat history is saved in the browser’s local storage, ensuring it remains even if you refresh the page. However, you can easily delete chats by clicking on the dedicated “Delete Chat” button.
If you prefer learning through video tutorials, the provided video is an excellent resource for you to understand the process of creating your own ChatGPT. In the video, I explain each line of code and provide informative comments to make it beginner-friendly and easy to follow.
However, if you prefer reading blog posts or want a quick summary of the steps involved in creating a ChatGPT clone project, you can continue reading this post. By the end of this post, you will have your own ChatGPT that you can chat with.
Steps To Create ChatGPT Clone in HTML & JavaScript

To create your own ChatGPT using HTML, CSS, and JavaScript, follow these step-by-step instructions:
- Create a folder. You can name this folder whatever you want, and inside this folder, create the mentioned files.
- Create an
index.htmlfile. The file name must be index and its extension .html - Create a
style.cssfile. The file name must be style and its extension .css - Create a
script.jsfile. The file name must be script and its extension .js - Download and place the images folder in your project directory. This folder includes the user avatar and chatbot logo.
To start, add the following HTML codes to your index.html file: In this code snippet, you will find an empty “chat-container” div. We will later use JavaScript to dynamically add the “chat” div that will contain all the chat details.
<!DOCTYPE html>
<!-- Coding By CodingNepal - www.codingnepalweb.com -->
<html lang="en" dir="ltr">
  <head>
    <meta charset="utf-8">
    <title>ChatGPT Clone in JavaScript | CodingNepal</title>
    <link rel="stylesheet" href="style.css">
    <meta name="viewport" content="width=device-width, initial-scale=1.0">
    <!-- Google Fonts Link For Icons -->
    <link rel="stylesheet" href="https://fonts.googleapis.com/css2?family=Material+Symbols+Rounded:opsz,wght,FILL,GRAD@20..48,100..700,0..1,-50..200" />
    <script src="script.js" defer></script>
  </head>
  <body>
    <!-- Chats container -->
    <div class="chat-container"></div>

    <!-- Typing container -->
    <div class="typing-container">
      <div class="typing-content">
        <div class="typing-textarea">
          <textarea id="chat-input" spellcheck="false" placeholder="Enter a prompt here" required></textarea>
          <span id="send-btn" class="material-symbols-rounded">send</span>
        </div>
        <div class="typing-controls">
          <span id="theme-btn" class="material-symbols-rounded">light_mode</span>
          <span id="delete-btn" class="material-symbols-rounded">delete</span>
      </div>
    </div>

  </body>
</html>
Next, add the following CSS codes to your style.css file to apply visual styling to your ChatGPT interface. Now, if you load the web page in your browser, you will see ChatGPT displayed with a text input box and some icons at the bottom.
/* Import Google font - Poppins */
@import url('https://fonts.googleapis.com/css2?family=Poppins:wght@400;500;600&display=swap');
* {
  margin: 0;
  padding: 0;
  box-sizing: border-box;
  font-family: "Poppins", sans-serif;
}
:root {
  --text-color: #FFFFFF;
  --icon-color: #ACACBE;
  --icon-hover-bg: #5b5e71;
  --placeholder-color: #dcdcdc;
  --outgoing-chat-bg: #343541;
  --incoming-chat-bg: #444654;
  --outgoing-chat-border: #343541;
  --incoming-chat-border: #444654;
}
.light-mode {
  --text-color: #343541;
  --icon-color: #a9a9bc;
  --icon-hover-bg: #f1f1f3;
  --placeholder-color: #6c6c6c;
  --outgoing-chat-bg: #FFFFFF;
  --incoming-chat-bg: #F7F7F8;
  --outgoing-chat-border: #FFFFFF;
  --incoming-chat-border: #D9D9E3;
}
body {
  background: var(--outgoing-chat-bg);
}

/* Chats container styling */
.chat-container {
  overflow-y: auto;
  max-height: 100vh;
  padding-bottom: 150px;
}
:where(.chat-container, textarea)::-webkit-scrollbar {
  width: 6px;
}
:where(.chat-container, textarea)::-webkit-scrollbar-track {
  background: var(--incoming-chat-bg);
  border-radius: 25px;
}
:where(.chat-container, textarea)::-webkit-scrollbar-thumb {
  background: var(--icon-color);
  border-radius: 25px;
}
.default-text {
  display: flex;
  align-items: center;
  justify-content: center;
  flex-direction: column;
  height: 70vh;
  padding: 0 10px;
  text-align: center;
  color: var(--text-color);
}
.default-text h1 {
  font-size: 3.3rem;
}
.default-text p {
  margin-top: 10px;
  font-size: 1.1rem;
}
.chat-container .chat {
  padding: 25px 10px;
  display: flex;
  justify-content: center;
  color: var(--text-color);
}
.chat-container .chat.outgoing {
  background: var(--outgoing-chat-bg);
  border: 1px solid var(--outgoing-chat-border);
}
.chat-container .chat.incoming {
  background: var(--incoming-chat-bg);
  border: 1px solid var(--incoming-chat-border);
}
.chat .chat-content {
  display: flex;
  max-width: 1200px;
  width: 100%;
  align-items: flex-start;
  justify-content: space-between;
}
span.material-symbols-rounded {
  user-select: none;
  cursor: pointer;
}
.chat .chat-content span {
  cursor: pointer;
  font-size: 1.3rem;
  color: var(--icon-color);
  visibility: hidden;
}
.chat:hover .chat-content:not(:has(.typing-animation), :has(.error)) span {
  visibility: visible;
}
.chat .chat-details {
  display: flex;
  align-items: center;
}
.chat .chat-details img {
  width: 35px;
  height: 35px;
  align-self: flex-start;
  object-fit: cover;
  border-radius: 2px;
}
.chat .chat-details p {
  white-space: pre-wrap;
  font-size: 1.05rem;
  padding: 0 50px 0 25px;
  color: var(--text-color);
  word-break: break-word;
}
.chat .chat-details p.error {
  color: #e55865;
}
.chat .typing-animation {
  padding-left: 25px;
  display: inline-flex;
}
.typing-animation .typing-dot {
  height: 7px;
  width: 7px;
  border-radius: 50%;
  margin: 0 3px;
  opacity: 0.7;
  background: var(--text-color);
  animation: animateDots 1.5s var(--delay) ease-in-out infinite;
}
.typing-animation .typing-dot:first-child {
  margin-left: 0;
}
@keyframes animateDots {
  0%,44% {
    transform: translateY(0px);
  }
  28% {
    opacity: 0.4;
    transform: translateY(-6px);
  }
  44% {
    opacity: 0.2;
  }
}

/* Typing container styling */
.typing-container {
  position: fixed;
  bottom: 0;
  width: 100%;
  display: flex;
  padding: 20px 10px;
  justify-content: center;
  background: var(--outgoing-chat-bg);
  border-top: 1px solid var(--incoming-chat-border);
}
.typing-container .typing-content {
  display: flex;
  max-width: 950px;
  width: 100%;
  align-items: flex-end;
}
.typing-container .typing-textarea {
  width: 100%;
  display: flex;
  position: relative;
}
.typing-textarea textarea {
  resize: none;
  height: 55px;
  width: 100%;
  border: none;
  padding: 15px 45px 15px 20px;
  color: var(--text-color);
  font-size: 1rem;
  border-radius: 4px;
  max-height: 250px;
  overflow-y: auto;
  background: var(--incoming-chat-bg);
  outline: 1px solid var(--incoming-chat-border);
}
.typing-textarea textarea::placeholder {
  color: var(--placeholder-color);
}
.typing-content span {
  width: 55px;
  height: 55px;
  display: flex;
  border-radius: 4px;
  font-size: 1.35rem;
  align-items: center;
  justify-content: center;
  color: var(--icon-color);
}
.typing-textarea span {
  position: absolute;
  right: 0;
  bottom: 0;
  visibility: hidden;
}
.typing-textarea textarea:valid ~ span {
  visibility: visible;
}
.typing-controls {
  display: flex;
}
.typing-controls span {
  margin-left: 7px;
  font-size: 1.4rem;
  background: var(--incoming-chat-bg);
  outline: 1px solid var(--incoming-chat-border);
}
.typing-controls span:hover {
  background: var(--icon-hover-bg);
}

/* Reponsive Media Query */
@media screen and (max-width: 600px) {
  .default-text h1 {
    font-size: 2.3rem;
  }
  :where(.default-text p, textarea, .chat p) {
    font-size: 0.95rem!important;
  }
  .chat-container .chat {
    padding: 20px 10px;
  }
  .chat-container .chat img {
    height: 32px;
    width: 32px;
  }
  .chat-container .chat p {
    padding: 0 20px;
  }
  .chat .chat-content:not(:has(.typing-animation), :has(.error)) span {
    visibility: visible;
  }
  .typing-container {
    padding: 15px 10px;
  }
  .typing-textarea textarea {
    height: 45px;
    padding: 10px 40px 10px 10px;
  }
  .typing-content span {
    height: 45px;
    width: 45px;
    margin-left: 5px;
  }
  span.material-symbols-rounded {
    font-size: 1.25rem!important;
  }
}
Finally, add the following JavaScript code to your script.js file. This script code will make your ChatGPT functional by enabling features such as chatting, switching between dark and light themes, and saving chat history in the browser.
const chatInput = document.querySelector("#chat-input");
const sendButton = document.querySelector("#send-btn");
const chatContainer = document.querySelector(".chat-container");
const themeButton = document.querySelector("#theme-btn");
const deleteButton = document.querySelector("#delete-btn");

let userText = null;
const API_KEY = "PASTE-YOUR-API-KEY-HERE"; // Paste your API key here

const loadDataFromLocalstorage = () => {
    // Load saved chats and theme from local storage and apply/add on the page
    const themeColor = localStorage.getItem("themeColor");

    document.body.classList.toggle("light-mode", themeColor === "light_mode");
    themeButton.innerText = document.body.classList.contains("light-mode") ? "dark_mode" : "light_mode";

    const defaultText = `<div class="default-text">
                            <h1>ChatGPT Clone</h1>
                            <p>Start a conversation and explore the power of AI.<br> Your chat history will be displayed here.</p>
                        </div>`

    chatContainer.innerHTML = localStorage.getItem("all-chats") || defaultText;
    chatContainer.scrollTo(0, chatContainer.scrollHeight); // Scroll to bottom of the chat container
}

const createChatElement = (content, className) => {
    // Create new div and apply chat, specified class and set html content of div
    const chatDiv = document.createElement("div");
    chatDiv.classList.add("chat", className);
    chatDiv.innerHTML = content;
    return chatDiv; // Return the created chat div
}

const getChatResponse = async (incomingChatDiv) => {
    const API_URL = "https://api.openai.com/v1/completions";
    const pElement = document.createElement("p");

    // Define the properties and data for the API request
    const requestOptions = {
        method: "POST",
        headers: {
            "Content-Type": "application/json",
            "Authorization": `Bearer ${API_KEY}`
        },
        body: JSON.stringify({
            model: "text-davinci-003",
            prompt: userText,
            max_tokens: 2048,
            temperature: 0.2,
            n: 1,
            stop: null
        })
    }

    // Send POST request to API, get response and set the reponse as paragraph element text
    try {
        const response = await (await fetch(API_URL, requestOptions)).json();
        pElement.textContent = response.choices[0].text.trim();
    } catch (error) { // Add error class to the paragraph element and set error text
        pElement.classList.add("error");
        pElement.textContent = "Oops! Something went wrong while retrieving the response. Please try again.";
    }

    // Remove the typing animation, append the paragraph element and save the chats to local storage
    incomingChatDiv.querySelector(".typing-animation").remove();
    incomingChatDiv.querySelector(".chat-details").appendChild(pElement);
    localStorage.setItem("all-chats", chatContainer.innerHTML);
    chatContainer.scrollTo(0, chatContainer.scrollHeight);
}

const copyResponse = (copyBtn) => {
    // Copy the text content of the response to the clipboard
    const reponseTextElement = copyBtn.parentElement.querySelector("p");
    navigator.clipboard.writeText(reponseTextElement.textContent);
    copyBtn.textContent = "done";
    setTimeout(() => copyBtn.textContent = "content_copy", 1000);
}

const showTypingAnimation = () => {
    // Display the typing animation and call the getChatResponse function
    const html = `<div class="chat-content">
                    <div class="chat-details">
                        <img src="images/chatbot.jpg" alt="chatbot-img">
                        <div class="typing-animation">
                            <div class="typing-dot" style="--delay: 0.2s"></div>
                            <div class="typing-dot" style="--delay: 0.3s"></div>
                            <div class="typing-dot" style="--delay: 0.4s"></div>
                        </div>
                    </div>
                    <span onclick="copyResponse(this)" class="material-symbols-rounded">content_copy</span>
                </div>`;
    // Create an incoming chat div with typing animation and append it to chat container
    const incomingChatDiv = createChatElement(html, "incoming");
    chatContainer.appendChild(incomingChatDiv);
    chatContainer.scrollTo(0, chatContainer.scrollHeight);
    getChatResponse(incomingChatDiv);
}

const handleOutgoingChat = () => {
    userText = chatInput.value.trim(); // Get chatInput value and remove extra spaces
    if(!userText) return; // If chatInput is empty return from here

    // Clear the input field and reset its height
    chatInput.value = "";
    chatInput.style.height = `${initialInputHeight}px`;

    const html = `<div class="chat-content">
                    <div class="chat-details">
                        <img src="images/user.jpg" alt="user-img">
                        <p>${userText}</p>
                    </div>
                </div>`;

    // Create an outgoing chat div with user's message and append it to chat container
    const outgoingChatDiv = createChatElement(html, "outgoing");
    chatContainer.querySelector(".default-text")?.remove();
    chatContainer.appendChild(outgoingChatDiv);
    chatContainer.scrollTo(0, chatContainer.scrollHeight);
    setTimeout(showTypingAnimation, 500);
}

deleteButton.addEventListener("click", () => {
    // Remove the chats from local storage and call loadDataFromLocalstorage function
    if(confirm("Are you sure you want to delete all the chats?")) {
        localStorage.removeItem("all-chats");
        loadDataFromLocalstorage();
    }
});

themeButton.addEventListener("click", () => {
    // Toggle body's class for the theme mode and save the updated theme to the local storage
    document.body.classList.toggle("light-mode");
    localStorage.setItem("themeColor", themeButton.innerText);
    themeButton.innerText = document.body.classList.contains("light-mode") ? "dark_mode" : "light_mode";
});

const initialInputHeight = chatInput.scrollHeight;

chatInput.addEventListener("input", () => {
    // Adjust the height of the input field dynamically based on its content
    chatInput.style.height =  `${initialInputHeight}px`;
    chatInput.style.height = `${chatInput.scrollHeight}px`;
});

chatInput.addEventListener("keydown", (e) => {
    // If the Enter key is pressed without Shift and the window width is larger
    // than 800 pixels, handle the outgoing chat
    if (e.key === "Enter" && !e.shiftKey && window.innerWidth > 800) {
        e.preventDefault();
        handleOutgoingChat();
    }
});

loadDataFromLocalstorage();
sendButton.addEventListener("click", handleOutgoingChat);
Remember, your ChatGPT is not yet ready to generate chats based on prompts. To make it functional, you need to pay attention to a crucial detail in the code. Take a closer look, and you’ll notice that you have to paste an “OpenAI API key” into the API_KEY variable.
To get your API key, visit the following URL: https://platform.openai.com/account/api-keys. Once there, log in to your account, and you will be able to generate a free API key. To understand other things in the code. I recommend watching the tutorial video, reading the code comments, and experimenting with the code.
” Remember that when you sign up for OpenAI, you’ll get a free $5 credit for your API usage. If your account is older than 3 months or the credit runs out, you’ll need a paid account or create a new one with a new number to keep using the API. Your API usage and expiration date can be found on the account’s usage page.”
Conclusion and Final Words
Congratulations! You have successfully created a ChatGPT clone project using HTML, CSS, and vanilla JavaScript and integrated it with the OpenAI API. Now, you can engage in meaningful conversations and showcase your talent to friends and beyond.
I encourage you to continue improving your skills by diving into other exciting real-world projects such as JavaScript API projects, JavaScript games, Form validations, Image sliders, and more.
If you encounter any difficulties while creating your own ChatGPT or your code is not working as expected, you can download the source code files for this ChatGPT clone project for free by clicking the Download button. You can also view a live demo of it by clicking the View Live button.
Remember that after downloading the file, you’ll have to paste an “OpenAI API key” into the API_KEY variable in the script.js file. To get your API key, visit the following URL: https://platform.openai.com/account/api-keys. Once there, log in to your account, and you will be able to generate a free API key.


