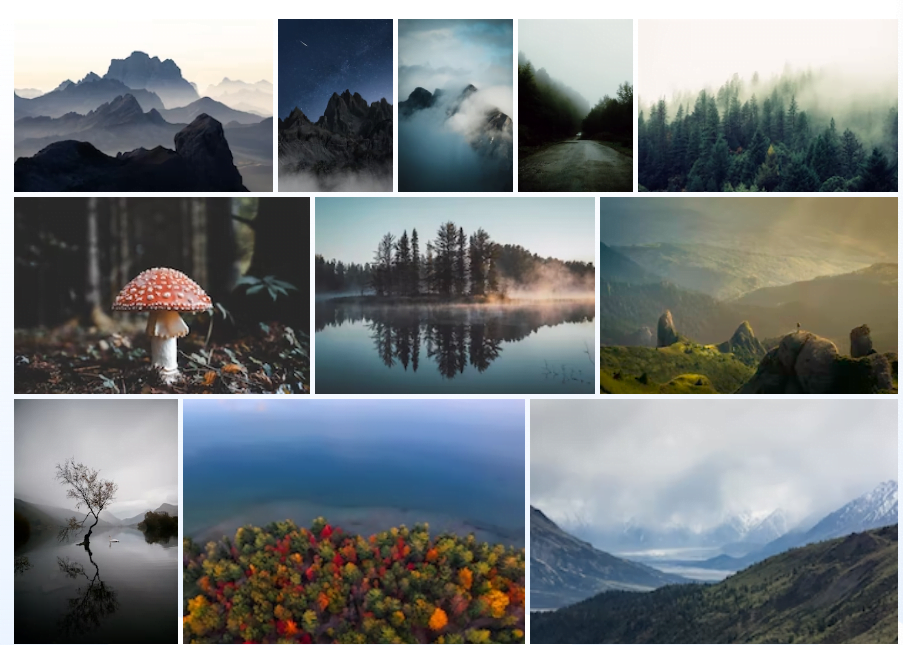
Are you a web designer or developer in search of copyright-free Image Gallery for your projects? Pexels is a go-to platform for many, but have you ever wanted to craft your own functional Image Gallery akin to Pexels?
In this blog post, I’ll guide you through the process of building a fully-operational image gallery using HTML, CSS, and JavaScript. Through this project, you’ll not only grasp the fundamentals of DOM manipulation, event handling, and CSS styling but also acquire hands-on experience with APIs.
Embark on this coding journey with our Pexels clone project, where you can seamlessly browse, preview, and download images in a matter of seconds. The gallery showcases images in a sleek masonry layout, adaptable to all devices, from desktops to mobile phones.
If you’re eager to witness a live demonstration of this image gallery, click here. Additionally, for a comprehensive video tutorial on creating a functional image gallery using HTML, CSS, and JavaScript, feel free to watch our YouTube video tutorial provided below.
Here are the step-by-step instructions for creating an image gallery using HTML, CSS, and vanilla JavaScript:
- Create a Folder: Begin by creating a folder for your project. You can name it as per your preference.
- Create Files: Inside the project folder, create the following files:
index.html: This file will serve as the main HTML file for your project.style.css: This file will contain the CSS styles for your project.script.js: This file will contain the JavaScript code for your project.
- Download Images: Download the images folder from Google Drive and place it inside your project folder. These images will be used in your image gallery.
- HTML Setup: Add the following HTML code to your
index.htmlfile to set up the basic layout for your image gallery. Note that the<ul>container is currently empty but will be populated with<li>elements representing image cards later using JavaScript.

HTML code for Functional Image Gallery
<!DOCTYPE html>
<!-- Coding By CodingNepal - youtube.com/codingnepal -->
<html lang="en" dir="ltr">
  <head>
    <meta charset="utf-8">
    <title>Image Gallery with JavaScript | CodingNepal</title>
    <link rel="stylesheet" href="style.css">
    <meta name="viewport" content="width=device-width, initial-scale=1.0">
    <link rel="stylesheet" href="https://unicons.iconscout.com/release/v4.0.0/css/line.css">
    <script src="script.js" defer></script>
  </head>
  <body>
    <div class="lightbox">
      <div class="wrapper">
        <header>
          <div class="photographer">
            <i class="uil uil-camera"></i>
            <span></span>
          </div>
          <div class="buttons">
            <i class="uil uil-import"></i>
            <i class="close-icon uil uil-times"></i>
          </div>
        </header>
        <div class="preview-img">
          <div class="img"><img src="" alt="preview-img"></div>
        </div>
      </div>
    </div>
    <section class="search">
      <img src="./images/search-img.jpg" alt="search-img">
      <div class="content">
        <h1>Image Gallery with JavaScript</h1>
        <p>Search and download any images within a second</p>
        <div class="search-box">
          <i class="uil uil-search"></i>
          <input type="text" placeholder="Search images">
        </div>
      </div>
    </section>
    <section class="gallery">
      <ul class="images"></ul>
      <button class="load-more">Load More</button>
    </section>

  </body>
</html>
Ensure to include the CSS file (style.css) and JavaScript file (script.js) in the appropriate locations within the HTML file.
This HTML structure sets up the basic layout for your image gallery, including a header, a gallery section with a search section and an unordered list (<ul>) where image cards will be dynamically added.
That’s the initial setup. Next, you’ll populate the gallery with images and add functionality using CSS and JavaScript.
Next, add the following CSS codes to your style.css file to give a basic look and feel to the image gallery. If you wish, you can customize it to your liking by changing the color, font, size, and other CSS properties in the file.
CSS for Functional Image Gallery
/* Import Google font - Poppins */
@import url('https://fonts.googleapis.com/css2?family=Poppins:wght@400;500;600&display=swap');
* {
  margin: 0;
  padding: 0;
  box-sizing: border-box;
  font-family: "Poppins", sans-serif;
}
.search {
  height: 40vh;
  display: flex;
  position: relative;
  align-items: center;
  justify-content: center;
}
.search::before, .search img, .lightbox {
  left: 0;
  top: 0;
  width: 100%;
  height: 100%;
  position: absolute;
}
.search::before {
  content: "";
  z-index: 1;
  background: rgba(0,0,0,0.25);
}
.search img {
  object-fit: cover;
}
.search .content {
  z-index: 2;
  color: #fff;
  padding: 0 13px;
  text-align: center;
  position: relative;
}
.search h1 {
  font-size: 2.65rem;
  font-weight: 600;
}
.search p {
  margin-top: 8px;
  font-size: 1.5rem;
}
.search .search-box {
  height: 55px;
  margin: 45px 0;
  position: relative;
}
.search-box i {
  position: absolute;
  left: 20px;
  top: 50%;
  cursor: default;
  color: #8D8D8D;
  font-size: 1.4rem;
  transform: translateY(-50%);
}
.search-box input {
  width: 100%;
  height: 100%;
  outline: none;
  border: none;
  font-size: 1.1rem;
  padding-left: 55px;
  background: #fff;
  border-radius: 5px;
}
.search-box input::placeholder {
  color: #929292;
}
.search-box input:focus::placeholder {
  color: #bfbfbf;
}
.gallery {
  display: flex;
  flex-direction: column;
  align-items: center;
}
.gallery .images {
  gap: 15px;
  max-width: 95%;
  margin-top: 40px;
  columns: 5 340px;
  list-style: none;
}
.gallery .images .card {
  display: flex;
  cursor: pointer;
  overflow: hidden;
  position: relative;
  margin-bottom: 14px;
  border-radius: 4px;
}
.gallery .images img {
  width: 100%;
  z-index: 2;
  position: relative;
}
.images .details {
  position: absolute;
  z-index: 4;
  width: 100%;
  bottom: -100px;
  display: flex;
  align-items: center;
  padding: 15px 20px;
  justify-content: space-between;
  transition: bottom 0.1s ease;
  background: linear-gradient(to top, rgba(0, 0, 0, 0.7), transparent);
}
.images li:hover .details {
  bottom: 0;
}
.photographer {
  color: #fff;
  display: flex;
  align-items: center;
}
.photographer i {
  font-size: 1.4rem;
  margin-right: 10px;
}
.photographer span {
  font-size: 1.05rem;
}
button, i {
  outline: none;
  border: none;
  cursor: pointer;
  border-radius: 5px;
  transition: 0.2s ease;
}
.details button {
  background: #fff;
  font-size: 1.1rem;
  padding: 3px 8px;
}
.details .download-btn:hover {
  background: #f2f2f2;
}
.gallery .load-more {
  color: #fff;
  background: #8A6CFF;
  margin: 50px 0;
  font-size: 1.2rem;
  padding: 12px 27px;
}
.gallery .load-more.disabled {
  opacity: 0.6;
  pointer-events: none;
}
.gallery .load-more:hover {
  background: #704dff;
}

.lightbox {
  z-index: 5;
  position: fixed;
  visibility: hidden;
  background: rgba(0,0,0,0.65);
}
.lightbox.show {
  visibility: visible;
}
.lightbox .wrapper {
  position: fixed;
  left: 50%;
  top: 50%;
  width: 100%;
  padding: 20px;
  max-width: 850px;
  background: #fff;
  border-radius: 6px;
  opacity: 0;
  pointer-events: none;
  transform: translate(-50%, -50%) scale(0.9);
  transition: transform 0.1s ease;
}
.lightbox.show .wrapper {
  opacity: 1;
  pointer-events: auto;
  transform: translate(-50%, -50%) scale(1);
}
.wrapper header {
  display: flex;
  align-items: center;
  justify-content: space-between;
}
header .photographer {
  color: #333;
}
header .photographer i {
  font-size: 1.7rem;
  cursor: auto;
}
header .photographer span {
  font-size: 1.2rem;
}
header .buttons i {
  height: 40px;
  width: 40px;
  display: inline-block;
  color: #fff;
  font-size: 1.2rem;
  line-height: 40px;
  text-align: center;
  background: #8A6CFF;
  border-radius: 4px;
  transition: 0.2s ease;
}
header .buttons i:first-child:hover {
  background: #704dff;
}
header .buttons i:last-child {
  margin-left: 10px;
  font-size: 1.25rem;
  background: #6C757D;
}
header .buttons i:last-child:hover {
  background: #5f666d;
}
.wrapper .preview-img {
  display: flex;
  justify-content: center;
  margin-top: 25px;
}
.preview-img .img {
  max-height: 65vh;
}
.preview-img img {
  width: 100%;
  height: 100%;
  object-fit: contain;
}

@media screen and (max-width: 688px) {
  .lightbox .wrapper {
    padding: 12px;
    max-width: calc(100% - 26px);
  }
  .wrapper .preview-img {
    margin-top: 15px;
  }
  header .buttons i:last-child {
    margin-left: 7px;
  }
  header .photographer span, .search p {
    font-size: 1.1rem;
  }
  .search h1 {
    font-size: 1.8rem;
  }
  .search .search-box {
    height: 50px;
    margin: 30px 0;
  }
  .gallery .images {
    max-width: 100%;
    padding: 0 13px;
    margin-top: 20px;
  }
  .images .details {
    bottom: 0px;
  }
  .gallery .load-more {
    padding: 10px 25px;
    font-size: 1.05rem;
  }
}
Here’s the JavaScript code to add functionality for searching, viewing, and downloading images from the gallery:
JS for Functional Image Gallery
const imageWrapper = document.querySelector(".images");
const searchInput = document.querySelector(".search input");
const loadMoreBtn = document.querySelector(".gallery .load-more");
const lightbox = document.querySelector(".lightbox");
const downloadImgBtn = lightbox.querySelector(".uil-import");
const closeImgBtn = lightbox.querySelector(".close-icon");

// API key, paginations, searchTerm variables
const apiKey = "PASTE-YOUR-API-KEY";
const perPage = 15;
let currentPage = 1;
let searchTerm = null;

const downloadImg = (imgUrl) => {
    // Converting received img to blob, creating its download link, & downloading it
    fetch(imgUrl).then(res => res.blob()).then(blob => {
        const a = document.createElement("a");
        a.href = URL.createObjectURL(blob);
        a.download = new Date().getTime();
        a.click();
    }).catch(() => alert("Failed to download image!"));
}

const showLightbox = (name, img) => {
    // Showing lightbox and setting img source, name and button attribute
    lightbox.querySelector("img").src = img;
    lightbox.querySelector("span").innerText = name;
    downloadImgBtn.setAttribute("data-img", img);
    lightbox.classList.add("show");
    document.body.style.overflow = "hidden";
}

const hideLightbox = () => {
    // Hiding lightbox on close icon click
    lightbox.classList.remove("show");
    document.body.style.overflow = "auto";
}

const generateHTML = (images) => {
    // Making li of all fetched images and adding them to the existing image wrapper
    imageWrapper.innerHTML += images.map(img =>
        `<li class="card">
            <img onclick="showLightbox('${img.photographer}', '${img.src.large2x}')" src="${img.src.large2x}" alt="img">
            <div class="details">
                <div class="photographer">
                    <i class="uil uil-camera"></i>
                    <span>${img.photographer}</span>
                </div>
                <button onclick="downloadImg('${img.src.large2x}');">
                    <i class="uil uil-import"></i>
                </button>
            </div>
        </li>`
    ).join("");
}

const getImages = (apiURL) => {
    // Fetching images by API call with authorization header
    searchInput.blur();
    loadMoreBtn.innerText = "Loading...";
    loadMoreBtn.classList.add("disabled");
    fetch(apiURL, {
        headers: { Authorization: apiKey }
    }).then(res => res.json()).then(data => {
        generateHTML(data.photos);
        loadMoreBtn.innerText = "Load More";
        loadMoreBtn.classList.remove("disabled");
    }).catch(() => alert("Failed to load images!"));
}

const loadMoreImages = () => {
    currentPage++; // Increment currentPage by 1
    // If searchTerm has some value then call API with search term else call default API
    let apiUrl = `https://api.pexels.com/v1/curated?page=${currentPage}&per_page=${perPage}`;
    apiUrl = searchTerm ? `https://api.pexels.com/v1/search?query=${searchTerm}&page=${currentPage}&per_page=${perPage}` : apiUrl;
    getImages(apiUrl);
}

const loadSearchImages = (e) => {
    // If the search input is empty, set the search term to null and return from here
    if (e.target.value === "") return searchTerm = null;
    // If pressed key is Enter, update the current page, search term & call the getImages
    if (e.key === "Enter") {
        currentPage = 1;
        searchTerm = e.target.value;
        imageWrapper.innerHTML = "";
        getImages(`https://api.pexels.com/v1/search?query=${searchTerm}&page=1&per_page=${perPage}`);
    }
}

getImages(`https://api.pexels.com/v1/curated?page=${currentPage}&per_page=${perPage}`);
loadMoreBtn.addEventListener("click", loadMoreImages);
searchInput.addEventListener("keyup", loadSearchImages);
closeImgBtn.addEventListener("click", hideLightbox);
downloadImgBtn.addEventListener("click", (e) => downloadImg(e.target.dataset.img));
Certainly! Here’s how you can acquire your own Pexels API key and update the JavaScript code accordingly:
- Get Pexels API Key:
- Visit the official Pexels API documentation website.
- Sign up for a Pexels account or log in if you already have one.
- Navigate to the “API” section of your account settings.
- Generate an API key, or copy your existing API key if you already have one.
- Update JavaScript Code:
- Open your
script.jsfile. - Replace
'YOUR_PEXELS_API_KEY'with your actual Pexels API key obtained from the Pexels website.
- Open your
Conclusion and Final Words
Creating a functional image gallery using HTML, CSS, and JavaScript serves as an excellent project for beginners, offering hands-on experience with fundamental web development concepts such as DOM manipulation, event handling, CSS styling, and API integration.
Having gained knowledge and skills from this project, you now have the opportunity to further explore and enhance the functionality of your image gallery. Experimenting with the code allows you to take your project to new heights and refine your understanding of web development principles.
For more projects involving API integration and JavaScript, you can explore the blog post on “Top JavaScript API Projects for Beginners,” which provides additional opportunities to apply your newfound skills and knowledge.
Should you encounter any challenges or if your code doesn’t function as expected, you can access the source code files for this image gallery project for free. Simply click on the download button to obtain the zip file containing the project folder with all the necessary files. Don’t forget to insert your API key into the code for proper functionality. Happy coding!


